
Buying Guides
Prop TV Mounting Approval Checklist for Showroom Teams | DummyDevices
Planning wall-mounted dummy TVs for furniture showrooms? Use this checklist to verify dimensions, mounting compatibility, wall conditions, sample approval, and multi-store installation requirements.
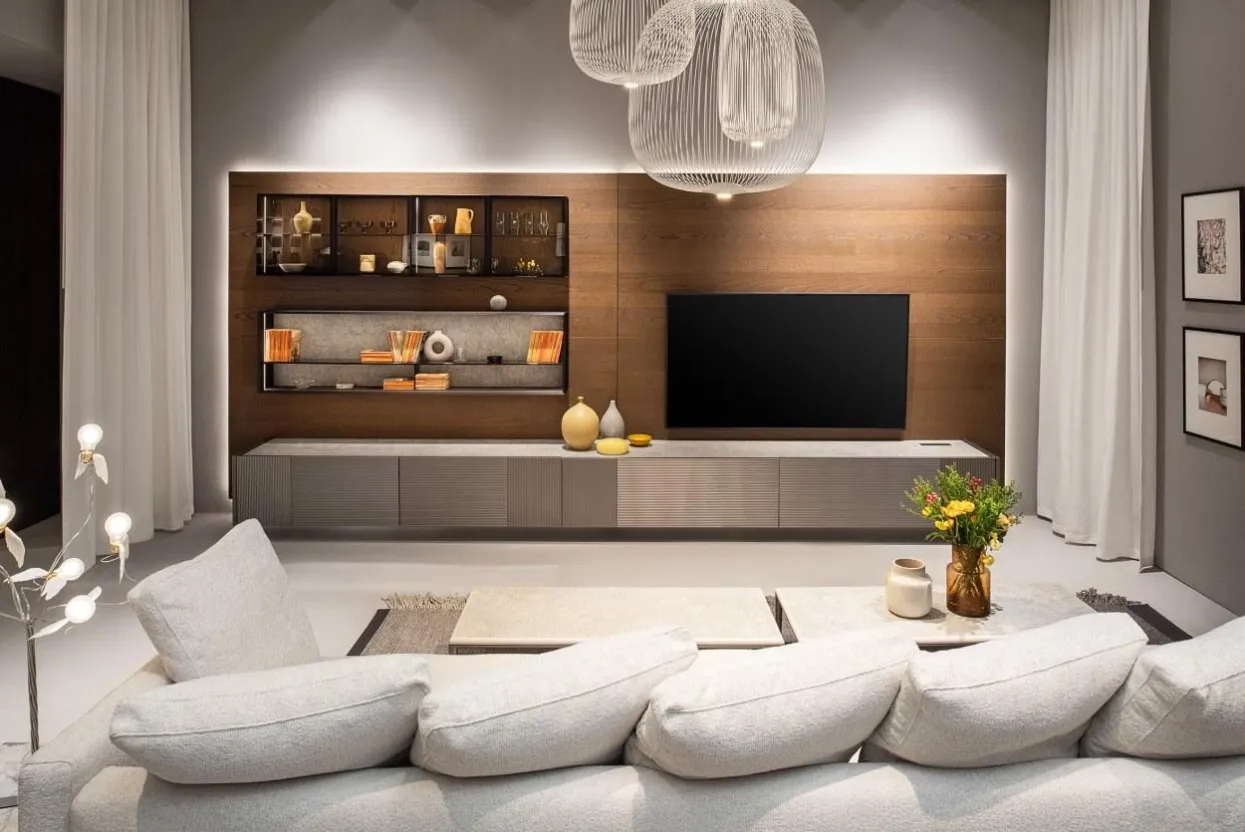
Prop TV Mounting Approval Checklist for Visual Merchandising Teams
A practical planning guide, approving and standardizing dummy TV installations across furniture showrooms and retail locations.
A wall-mounted television can become the visual anchor of a furniture showroom. It helps complete a living-room setting, establish the proportions of a media wall and make a display feel closer to a real home.
For visual merchandising teams, however, selecting the right screen size is only one part of the job.
Before installing dummy TVs across multiple stores, teams need to confirm product dimensions, mounting compatibility, wall conditions, installation methods and the approved display appearance.
These checks are particularly important when a furniture retailer is refreshing several showrooms or rolling out a consistent room-setting concept across a store network.
This checklist explains what to review before approving a prop TV for wall-mounted display.
1. Confirm the Intended Display Location
Start by identifying where each dummy TV will be installed.
Typical locations include:
- Living-room furniture displays
- Media walls and entertainment units
- Apartment and model-home staging
- Furniture showroom room settings
- Retail demonstration areas
- Exhibition and interior design projects
The intended location affects the required screen size, mounting height, viewing angle, and surrounding furniture arrangement.
For a multi-store project, record the display location by store number, room type, or approved floor-plan reference.
Do not rely on a general instruction such as "install one TV in each living room." Different room settings may require different sizes and mounting arrangements.
2. Select the Appropriate Dummy TV Size
The screen should be proportionate to the media wall, cabinet, and overall room composition.
Common sizes to evaluate for furniture showroom applications include:
Dummy TV Size | Typical Planning Application |
|---|---|
55-inch | Compact and standard living-room settings |
65-inch | Mainstream living-room displays |
75-inch | Larger media walls and spacious room settings |
85-inch and above | Large feature walls and flagship display environments |
These are general planning references, not fixed installation standards.
Before approving a size, compare the actual product's overall width and height with the available wall area and surrounding furniture.
A screen that looks appropriate in a product photograph may appear too large or too small when placed above a specific media cabinet.
3. Verify the Actual Product Dimensions
Never approve a wall installation using diagonal screen size alone.
Ask the supplier to provide the physical dimensions of the exact dummy TV model being considered.
Confirm:
- Overall width and height
- Product depth
- Frame dimensions
- Product weight
- Screen proportions
- Mounting-hole spacing, where applicable
- Required clearance around the product
The approved dimensions should be recorded in the project specification.
This is especially important when the TV is positioned within a fitted media wall, between decorative panels or above a cabinet with a limited installation area.
If the product specification changes, the visual merchandising team should review the updated dimensions before installation.
4. Confirm Wall-Mounting Compatibility
This is one of the most important approval stages.
Do not assume that every dummy TV supports the same wall-mounting method or uses the same mounting-hole pattern.
Ask the supplier to confirm the mounting arrangement for the exact model and size.
The approval should identify:
- Whether the selected model supports wall-mounted display
- The mounting-hole pattern or fixing-point arrangement
- Compatible bracket requirements
- Whether mounting accessories are included or supplied separately
- Any model-specific installation restrictions
If a standard bracket is being considered, verify compatibility against the actual product specifications before purchase.
A bracket that fits one screen model should not automatically be assumed to fit another.
5. Check the Wall Structure and Installation Conditions
The product specification is only one part of a safe installation.
The wall and supporting structure must also be suitable for the proposed mounting arrangement.
Before installation, the project team or qualified installer should assess:
- Wall construction and substrate
- Available structural backing
- Existing mounting provisions
- Surface condition
- Required fixing method
- Access for installation and future maintenance
For example, a solid wall, timber-backed panel and lightweight decorative partition may require different fixing arrangements.
Do not assume that a decorative media-wall panel is structurally suitable for supporting a mounted display.
The actual product weight, bracket requirements, wall construction and applicable local safety requirements must all be considered.
Use a qualified installer to confirm the appropriate fixing method.
6. Approve the Screen Height and Visual Alignment
A technically compatible installation can still look wrong if the screen is positioned poorly.
Visual merchandising teams should review the proposed installation in the context of the entire room setting.
Consider:
Relationship with the media cabinet
The screen should be visually balanced with the width and height of the entertainment unit.
Relationship with the seating arrangement
Review the intended viewing direction and the overall composition from the main customer approach.
Alignment with the room setting
Where multiple displays use the same concept, keep the visual positioning consistent.
Surrounding decorative elements
Check the relationship between the screen, wall panels, shelves, lighting and other decorative features.
Where possible, use a front-view drawing or a photograph of the proposed room setting to approve the final position.
7. Confirm the Screen Appearance and Artwork
The screen appearance should match the approved showroom concept.
Before placing a bulk order, clarify whether the project requires:
- A black-screen appearance
- Selected lifestyle imagery
- A consistent screen graphic across stores
- Different graphics for different room settings
- A specific frame finish
If custom artwork is required, establish an approval process before production or preparation.
Record the approved artwork reference and version so that future stores can reproduce the same appearance.
For a multi-location rollout, this small detail can help maintain consistency across the retail network.
8. Review the Sample Before Approving the Rollout
A sample evaluation should include both product appearance and installation suitability.
A practical sample review can cover:
Approval Item | What to Verify |
|---|---|
Appearance | Frame finish and screen presentation |
Dimensions | Actual width, height and depth |
Weight | Confirmed product weight |
Mounting | Model-specific fixing arrangement |
Compatibility | Proposed bracket and installation method |
Room setting | Visual balance with surrounding furniture |
Packaging | Protection during transport and handling |
Documentation | Approved product and installation references |
If the project involves several TV sizes, evaluate the relevant configurations rather than assuming that one approved sample covers the entire range.
Once approved, record the sample reference and the exact product specification.
9. Create a Standard Installation Record for Every Store
For a furniture retailer operating multiple locations, installation information should be easy to repeat.
A simple record can include:
- Store name and location
- Room-setting or display reference
- Dummy TV model and screen size
- Product dimensions and weight
- Mounting arrangement
- Approved bracket reference
- Wall construction and installation assessment
- Approved screen artwork
- Installation photographs
- Final approval date
This record gives store planning, visual merchandising, procurement and installation teams a shared reference.
It also reduces the risk of individual stores making unapproved substitutions during a rollout.
10. Coordinate Delivery and Installation Timing
Product delivery should be coordinated with the showroom installation schedule.
For multi-store projects, confirm:
- Required quantities by screen size
- Delivery destination for each shipment
- Central warehouse or direct-to-store receiving
- Packaging and carton identification
- Required arrival dates
- Installation sequence
- Spare or replacement requirements
If products are delivered to a central distribution center before being allocated to individual stores, carton labels and product references become particularly important.
The objective is to ensure that the correct product configuration reaches the correct display location at the right stage of the project.
11. Use This Prop TV Mounting Approval Checklist
Before approving a dummy TV for wall-mounted showroom display, review the following:
Display planning
- Intended room setting and installation location identified
- Screen size selected for the surrounding furniture
- Overall product dimensions reviewed
Product compatibility
- Exact model and product reference confirmed
- Product weight confirmed
- Wall-mounting support confirmed for the selected model
- Mounting-hole arrangement and bracket compatibility verified
Installation assessment
- Wall construction and supporting structure assessed
- Appropriate fixing method confirmed by a qualified installer
- Screen height and visual alignment approved
- Local installation and safety requirements considered
Visual approval
- Frame finish approved
- Screen appearance or artwork approved
- Sample evaluated
- Final product specification recorded
Rollout coordination
- Quantity by size confirmed
- Store allocation completed
- Packaging and delivery requirements confirmed
- Installation records and approval references prepared
Completing these checks before bulk procurement can help reduce specification changes, installation delays and inconsistent showroom presentation.
12. From One Approved Display to a Repeatable Store Standard
A single showroom installation may require only a product sample and a basic installation assessment.
A larger furniture retail network needs a more structured process.
The same approved product configuration should be identifiable across procurement documents, store plans, supplier quotations, receiving records, and installation references.
For visual merchandising and store planning teams, this creates a clearer path from the first pilot display to wider store deployment.
At DummyDevices by YIJIA Props, we support B2B customers sourcing non-functional dummy TVs and display electronics for furniture showrooms, model homes and commercial staging projects.
Our products are designed for visual presentation rather than television operation. They are non-functional display props and do not provide broadcast, streaming, or interactive screen functions.
For each project, buyers should confirm the selected model's dimensions, weight, mounting suitability, and required configuration before approving bulk supply.
Planning a Dummy TV Showroom Project?
Whether you are preparing one room setting or coordinating a multi-store furniture showroom rollout, start with the actual display requirements.
Share your preferred screen sizes, estimated quantities, display method, project locations, and target delivery schedule.
Our team can help review suitable dummy TV configurations and discuss sample evaluation and bulk supply requirements.
Approve the specification before scaling the display. A consistent showroom experience starts with a consistent product standard.